Okay, so we know that you can embed your stream on a website or blog (I’m sure you can see my stream hangin’ out in the right sidebar). But did you know that you can embed your stream on Twitter? Here’s an example,
Crazy! If you set it up right, your live stream will play in twitter without the user ever having to switch to Twitch. Now, of course the goal is to get them into your stream so they can chat – but this is a great way to attract new users who haven’t seen your stream yet. Once they see you live on twitter, they’ll realize how awesome you are and click the link to your stream!
Before we get into the detail’s I’d love to thank DaOpa who explained it first on his Twitch Blog. If you have a website with FTP upload you can follow his method. But if you are just a lil pleb like me, I’ll show you how to do this without spending a dime on a domain… Additionally – if you aren’t the type to DIY, fill out the form at the end of this blog and I will do this all for you! As a thanks for reading this 🙂
The Code
Here’s the code that I’m using. Note that this has my information in it for demonstration purposes, but I have highlighted the lines that you need to change.
 <html>
<head>
<meta name="twitter:image" content="https://i2.wp.com/twitchhelp.files.wordpress.com/2017/04/icon.png?ssl=1&w=450" />
<meta name="twitter:card" content="player" />
<meta name="twitter:title" content="Pods is LIVE!" />
<meta name="twitter:description" content="Hey I'm live right meow, come chill" /> <meta name="twitter:player" content="https://player.twitch.tv/?channel=PODSOFWAR&html5&muted=true&quality=mobile" />
<meta name="twitter:player:width" content="360" />
<meta name="twitter:player:height" content="200" />
<title> >^..^< </title>
</head>
<body> I'm live right meow! Join the Podsitivity </body>
</html>
- Line 3 – You’ll need to link the profile picture that you want to use, it must be a square image. Add it after content=”
- Line 5 – Add a generic Title for your card after content=”.
- Line 6 – Add a generic description after content =” This won’t show in your tweet, I think it’s for Twitter’s approval process.
- Line 6 – edit the URL with your channel name. ie delete “podsofwar” and replace with your Twitch username.
- Line 9 – Add a title for your webpage. I’m not sure this is completely necessary, but it doesn’t hurt to have.
- Line 11 – Add a body for your webpage. Again, I’m not sure this is completely necessary, but it doesn’t hurt to have.
Okay, where do I post this HTML?
Okay, so we’re going to need to paste this HTML on the internet somewhere. But that doesn’t mean you need to pay for a website! What I did was, I created a free blog on blogger.com. This blog doesn’t actually have any content, it’s just holding the HTML for me. So go ahead and sign up for a free blog, it takes about 5 minutes. After you are registered, you’ll want to create a new “Page” (not a new Post) and paste in the HTML from above. (Don’t click the “compose” slider on the top left, keep this at HTML). Once you’ve done that click “Publish” on the top right hand side.
Once you’ve published you’ll be sent back to a list of your Pages. Hover over the page that you made, (it could be called untitled, or whatever title you gave it) and select “View”. Example:

Here’s your webpage! Don’t mind what the page looks like – what you need to do is copy the URL of this page. This is usually in the top left hand corner of your browser. This is what you will need for the next steps.
Get your card approved by Twitter
You need to submit your card to be approved by twitter. Good thing is that its very easy. Simply go to this website and paste in the URL you just copied. Twitter will look through the code and make sure its all fine and dandy. Now, chances are your blog is not already “whitelisted” so you won’t be able to generate a preview. Here’s what the log should say:
INFO: Page fetched successfully

INFO: 15 metatags were found

INFO: twitter:card = player tag found

WARN: Not whitelisted
Press “request approval” and it will ask you your name, email, and twitter username. Now you wait for an email from Twitter. But don’t worry! Both times this happened to me my card was accepted by the next day. I received an email in my inbox so be sure to use a real email address when signing up!
So… my card is approved now what?
Now its time to tweet! You’ll need the URL of your blog page, (the one you copied above). Paste that into your tweet, along with whatever you want to say and voilà! You have embedded your stream into Twitter. Here’s what it looks like initially:
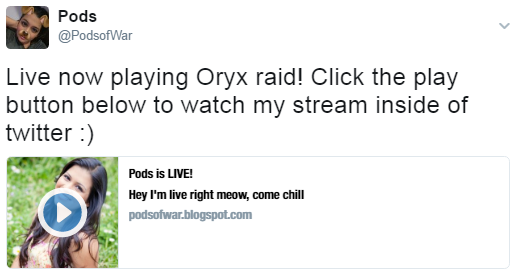
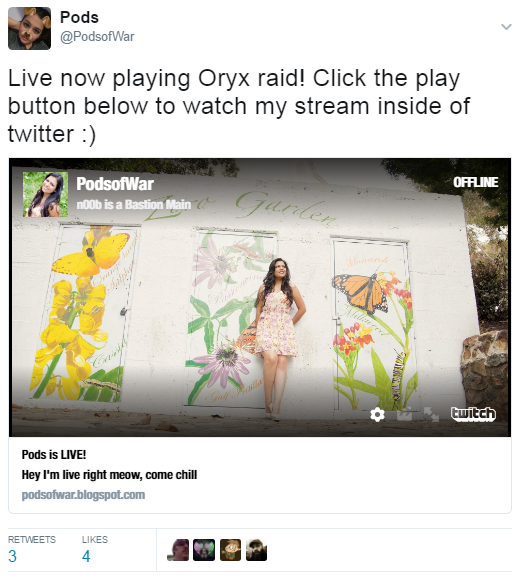
And then whenever someone clicks the “play” button, the tweet expands to look like this:
This allows anyone to watch your stream straight from twitter. If they like what they see, the video also acts like a hyperlink to your channel! I think this feature is an awesome new way to stand out in a Twitter feed. This is also a better way to share your stream than simply posting your twitch link (Because the titles, pictures, and game you are playing are usually outdated!).
Let me do it for you
As promised, as a thank you for reading my blog I’m totally willing to do all the hard work for you in getting this set up! Simply fill out the form here and I will email you a URL to use to embed your stream. I’ll do the HTML, I’ll host it on my fake blogger site (not this one – FYI for some reason this method doesn’t work with free WordPress blogs), and I’ll email you the URL that you can tweet out.
Taco Cat out.

